Created: 14 Oct 2018, last update: 30 Jan 2022
Sitecore Forms Serverless Upload
Sitecore Forms do not have an upload field out of the box, like WFFM. Uploaded files represent a significant risk, see OWASP unrestricted file upload. Sitecore Forms is meant to let content editor also create forms, are you sure they know what they do in terms of risk? Any way this Article is about creating an upload with a serverless approach with an Ajax call.
There are two ways to add the upload functionality to Sitecore Forms,
- AJAX call, the approach in this article.
For the AJAX call, you need to have an endpoint to submit to. It is not necessary that the endpoint is on the Sitecore servers. That is an opportunity to use a cloud native approach and create a safer and scalable solution. Azure functions is very suitable for this and it costs almost nothing. Use the advantages of serverless. With the AJAX call you can directly upload without waiting on the Form submit. very suitable for profile photos, also possible to easily expand with create thumbnail or scan on adult content with Azure Cognitive Services.
- Normal multipart/form-data post
For the Normal mulipart/form-data post you need to modified the JavaScript files included with Sitecore and process the upload on the Sitecore server. See this blog from Bart Verdonck file upload for sitecore forms
Creating a custom form element
See the documentation for the Sitecore part https://doc.sitecore.net/sitecore_experience_platform/digital_marketing/sitecore_forms
The view for an AJAX upload look like this:
@using Stockpick.Forms.Feature.ExperienceForms.Extensions
@using Sitecore.ExperienceForms.Mvc.Html
@using Sitecore.ExperienceForms.Mvc
@model Stockpick.Forms.Feature.ExperienceForms.Model.Content.UploadViewModel

<label for="@("file"+Html.IdFor(m => Model.Value))" class="@Model.LabelCssClass">@Html.DisplayTextFor(t => Model.Title)</label>
<input id="@("file"+Html.IdFor(m => Model.Value))" name="@Html.NameFor(m => Model.Value)" class="uploadInputField @Model.CssClass" type="file" value="@Model.Value" @if (Model.MaxLength > 0) { <text> maxlength="@Model.MaxLength" </text> } placeholder="@Model.PlaceholderText" data-sc-tracking="@Model.IsTrackingEnabled" data-sc-field-name="@Model.Name" @Html.GenerateUnobtrusiveValidationAttributes(m => m.Value) />
@Html.ValidationMessageFor(m => Model.Value)
<button id="@("upload"+ Html.IdFor(m => Model.Value))">Upload</button>
<input type="hidden" id="@Html.IdFor(m => Model.Value)" name="@Html.NameFor(m => Model.Value)" value="empty"/>
<span id="@("success"+ Html.IdFor(m => Model.Value))"></span>
<script>
	$("@("#upload"+Html.IdFor(m => Model.Value))").on("click", function (evt) {
		var documentData = new FormData();
		documentData.append('file', $('input#@("file"+Html.IdFor(m => Model.Value))')[0].files[0]);
		$.ajax({
		url: 'https://sitecoreupload.azurewebsites.net/api/SitecoreFormUpload',
		type: 'POST',
		data: documentData,
		cache: false,
		contentType: false,
		processData: false,
		success: function (response) {
			$("@("#success"+ Html.IdFor(m => Model.Value))").html("Upload done");
			$("@("#"+Html.IdFor(m => Model.Value))").attr('value',response.name);
		}
		});

		return false;
	});
</script>
This code contains an upload field and the logic to submit to an Azure function, HTTP trigger, the function generate a filename and store the upload and returns the filename. This name is put into a hidden field and this is treated as a normal string input field in Sitecore forms.
This is the Azure function in C#-script, quick and simple development in the Azure portal.
#r "Microsoft.WindowsAzure.Storage"
#r "Newtonsoft.Json"

using System;
using System.Configuration;
using System.Net;
using System.Text;
using Microsoft.Azure;
using Microsoft.WindowsAzure.Storage;
using Microsoft.WindowsAzure.Storage.Blob;
using Newtonsoft.Json;

// create,set the UploadStorageAccessKey in the Application settings, also add your url to the CORS
public static async Task Run(HttpRequestMessage req, TraceWriter log)
{
    HttpStatusCode result;

    result = HttpStatusCode.BadRequest;

    var provider = new MultipartMemoryStreamProvider();
    await req.Content.ReadAsMultipartAsync(provider);
    var file = provider.Contents.First();
    var fileInfo = file.Headers.ContentDisposition;
    var fileData = await file.ReadAsByteArrayAsync();

    if(fileData != null)
    {
        string name;

        name = Guid.NewGuid().ToString("n") + fileInfo.FileName.Replace("\"","");

        await CreateBlob(name, fileData, log);
        result = HttpStatusCode.OK;
        var jsonToReturn = JsonConvert.SerializeObject(new {name = name});

        return new HttpResponseMessage(result) {
            Content = new StringContent(jsonToReturn, Encoding.UTF8, "application/json")
        };
    }

    return req.CreateResponse(result, "");
}

private async static Task CreateBlob(string name, byte[] data, TraceWriter log)
{
    string connectionString;
    CloudStorageAccount storageAccount;
    CloudBlobClient client;
    CloudBlobContainer container;
    CloudBlockBlob blob;

    connectionString = ConfigurationManager.AppSettings["UploadStorageAccessKey"];
    storageAccount = CloudStorageAccount.Parse(connectionString);

    client = storageAccount.CreateCloudBlobClient();

    container = client.GetContainerReference("testing123");

    await container.CreateIfNotExistsAsync();

    blob = container.GetBlockBlobReference(name);
    if (name.EndsWith(".jpeg") || name.EndsWith(".jpg"))
    {
        blob.Properties.ContentType = "application/jpeg";
    }

    using (Stream stream = new MemoryStream(data))
    {
        await blob.UploadFromStreamAsync(stream);
    }
}
The complete solution can be found on GitHub
Installation Instructions for the Azure Function.
- In Visual Studio, publish project Feature/ExpienceForms/sitecoreupload to Azure
- In the Azure Portal create a storage account where you want to store the uploads.
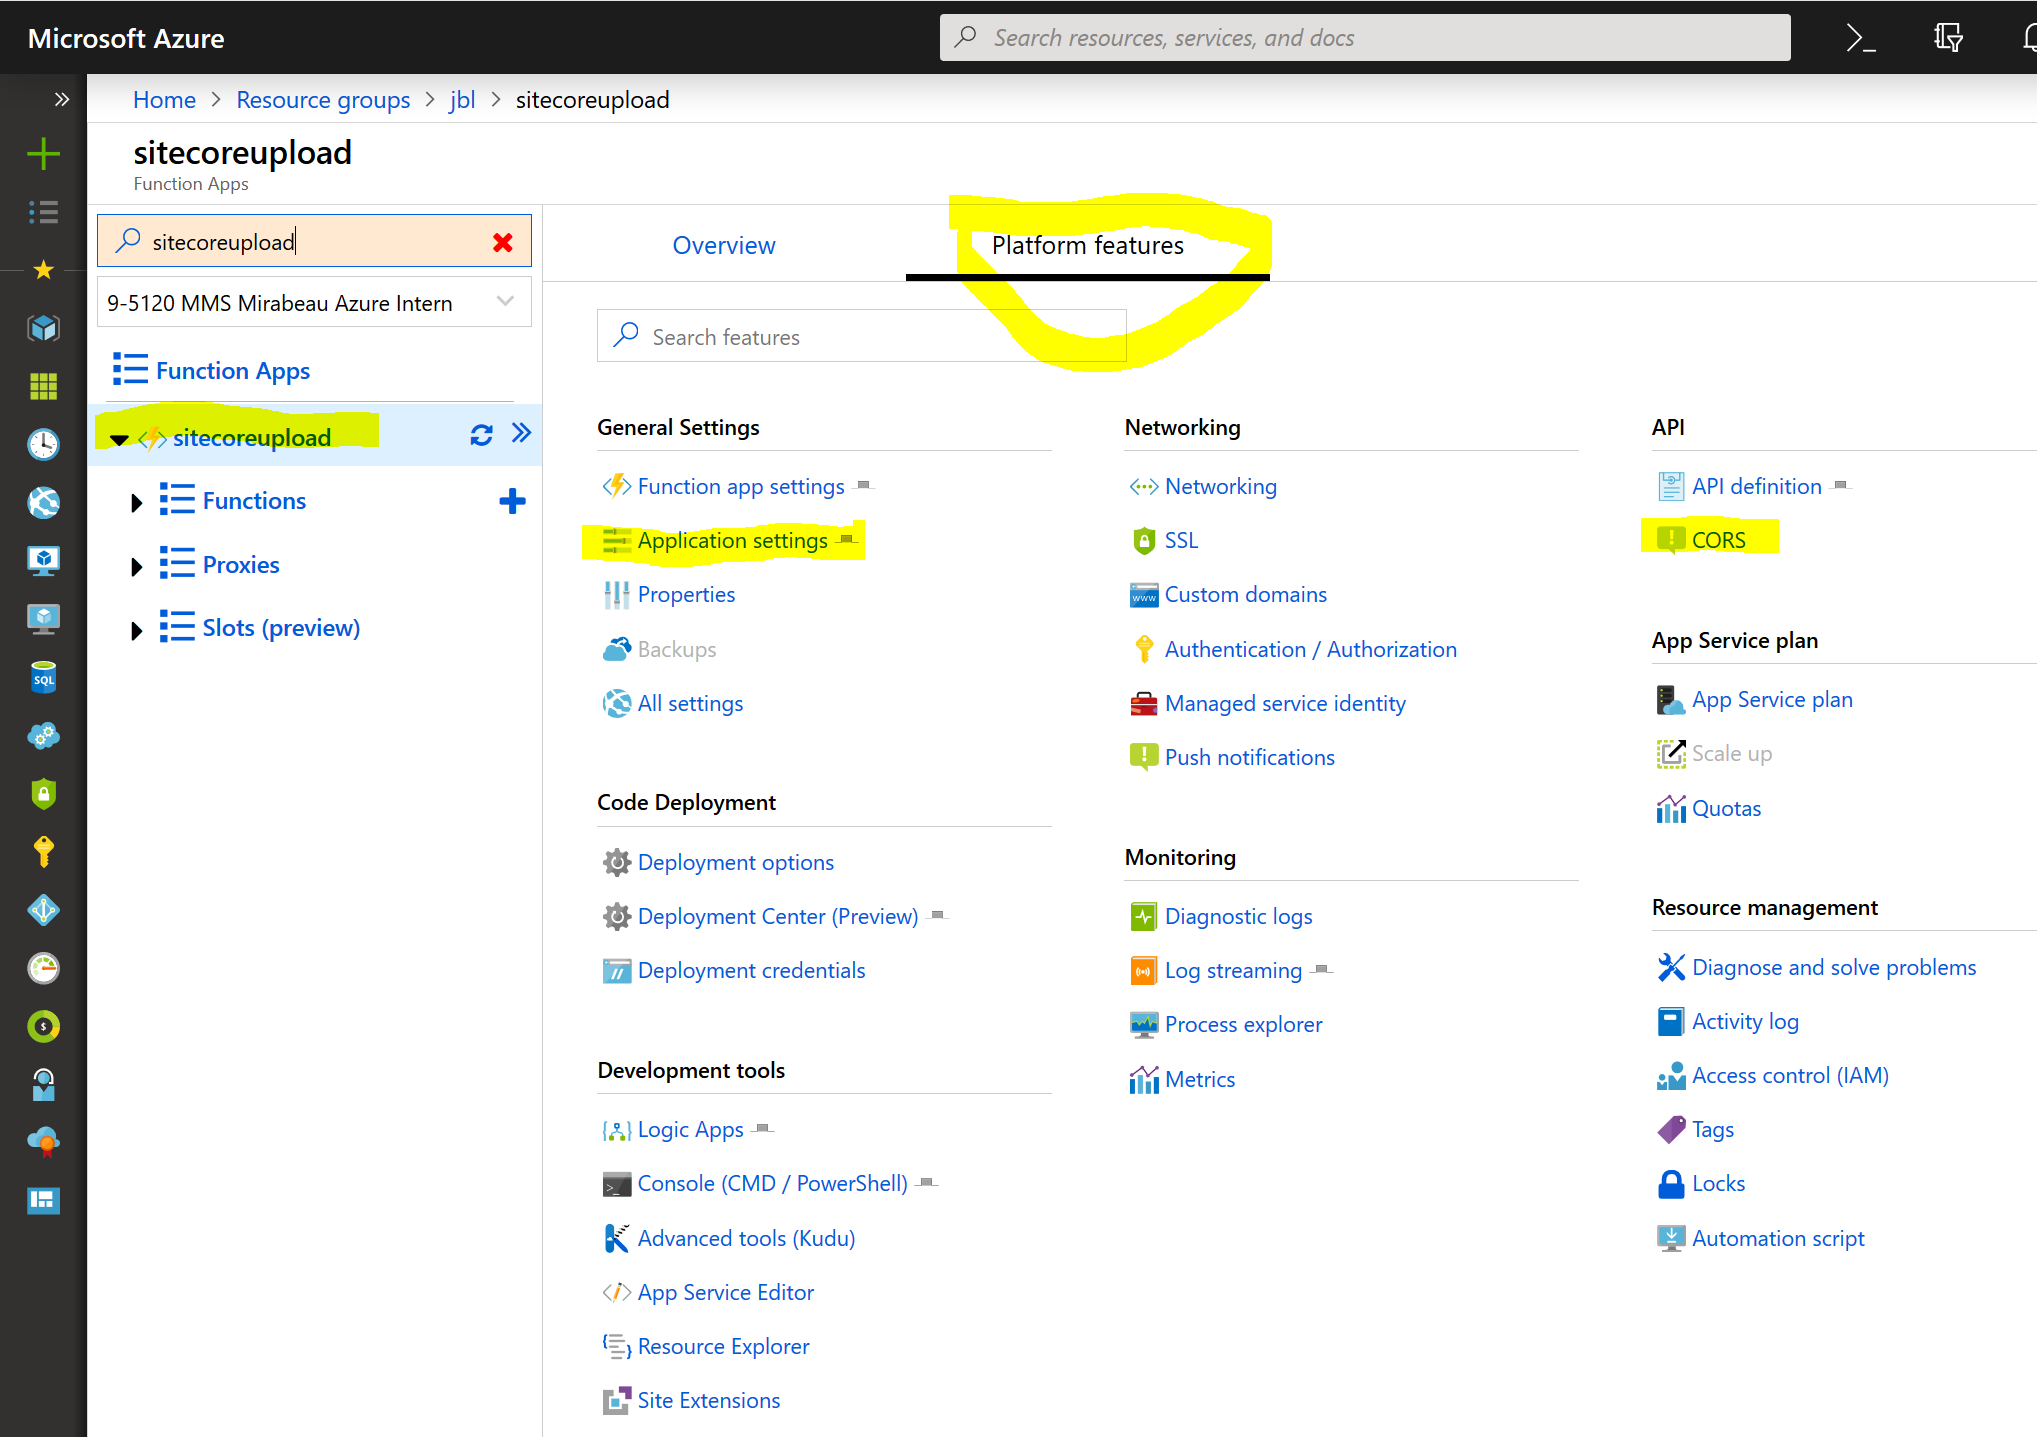
- In The Azure Portal, Go to the Function App, Platform features, Application settings. Configer Application settings UploadStorageAccessKey to the Azure Blob storage where you want to store the uploads.
- In the Azure Portal Go to the Function App, Platform features, CORS. Add your Sitecore hostnames to the Azure function CORS.
- In Visual studio Set your URL to the Azure function in \Features\ExperienceForms\code\Views\FormBuilder\FormsExtensionPack\Upload.cshtml
Note: Adjust the Azure function to only accept the file types you support, also remember this is an open upload, virus scanning, and add authentication if the upload is for logged in users.
About the Sitecore-Forms-Extension-Pack
The current Sitecore Forms for Sitecore 9 is missing a lot of basic functionality with this extension pack you get extra validations, save actions and advanced fields. pull requests are appreciated. See https://github.com/jbluemink/Sitecore-Forms-Extension-Pack